
- Do It Yourself Kits & Supplies -
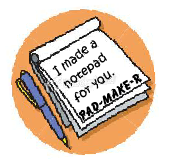
Making Personalized Notepads
Making Personalized Notepads
813-
How To Make Neat Pads
Instructions are included with each kit, but here are the basics:
The Pad Recipe is:
A computer
A printer
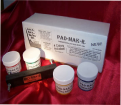
Pad-
Pad-
Scissors
Step 1
Determine the size of pad
Using a word processor or desktop publishing program,
Sub-divide the page to the desired shape and size
Determine the size of pad
Using a word processor or desktop publishing program,
Sub-
Insert and position any graphic
Create the text
Copy and Paste the finished pad into the other blocks on the page.
Print the page.
Create the text
Copy and Paste the finished pad into the other blocks on the page.
Print the page.
Step 2
Cut the paper to Pad-Bak™ size.
Add Pad-Bak™ between pad sheets
Stack and tap on a hard surface to align the edge to be adhesified.
(my word, so don’t bother looking it up.. It means ‘to glue’)
Cut the paper to Pad-
Add Pad-
Stack and tap on a hard surface to align the edge to be adhesified.
(my word, so don’t bother looking it up.. It means ‘to glue’)
Insert one or more pads into the Pad-Mak-R paper press
Tap on a hard surface again to align the edge to be adhesified
Tighten the wing-nuts to a firm but not smashing tension
Apply Pad-Mak-R™ Pad Adhesive
One solid coat is sufficient.
Let dry or until tacky
Remove from press
Slice apart if more than one pad was created
Tap on a hard surface
Tighten the wing-
Apply Pad-
One solid coat is sufficient.
Let dry or until tacky
Remove from press
Slice apart if more than one pad was created
Repeat entire process as needed
If you have any problems, ask your kids or grand kids to help.
They not only can figure these things out, but
They have great computer knowledge and
Finger dexterity is demonstrated by their texting / gaming skills.
You can also call me. :-)
If you have any problems, ask your kids or grand kids to help.
They not only can figure these things out, but
They have great computer knowledge and
Finger dexterity is demonstrated by their texting / gaming skills.
You can also call me. :-